Description: Students will create the foundations of a simple Flash web site. By following the directions below...students should be able to create simple navigational elements, use actionscript to dynamically place text, html, and images, and mimic a login/password scenario.
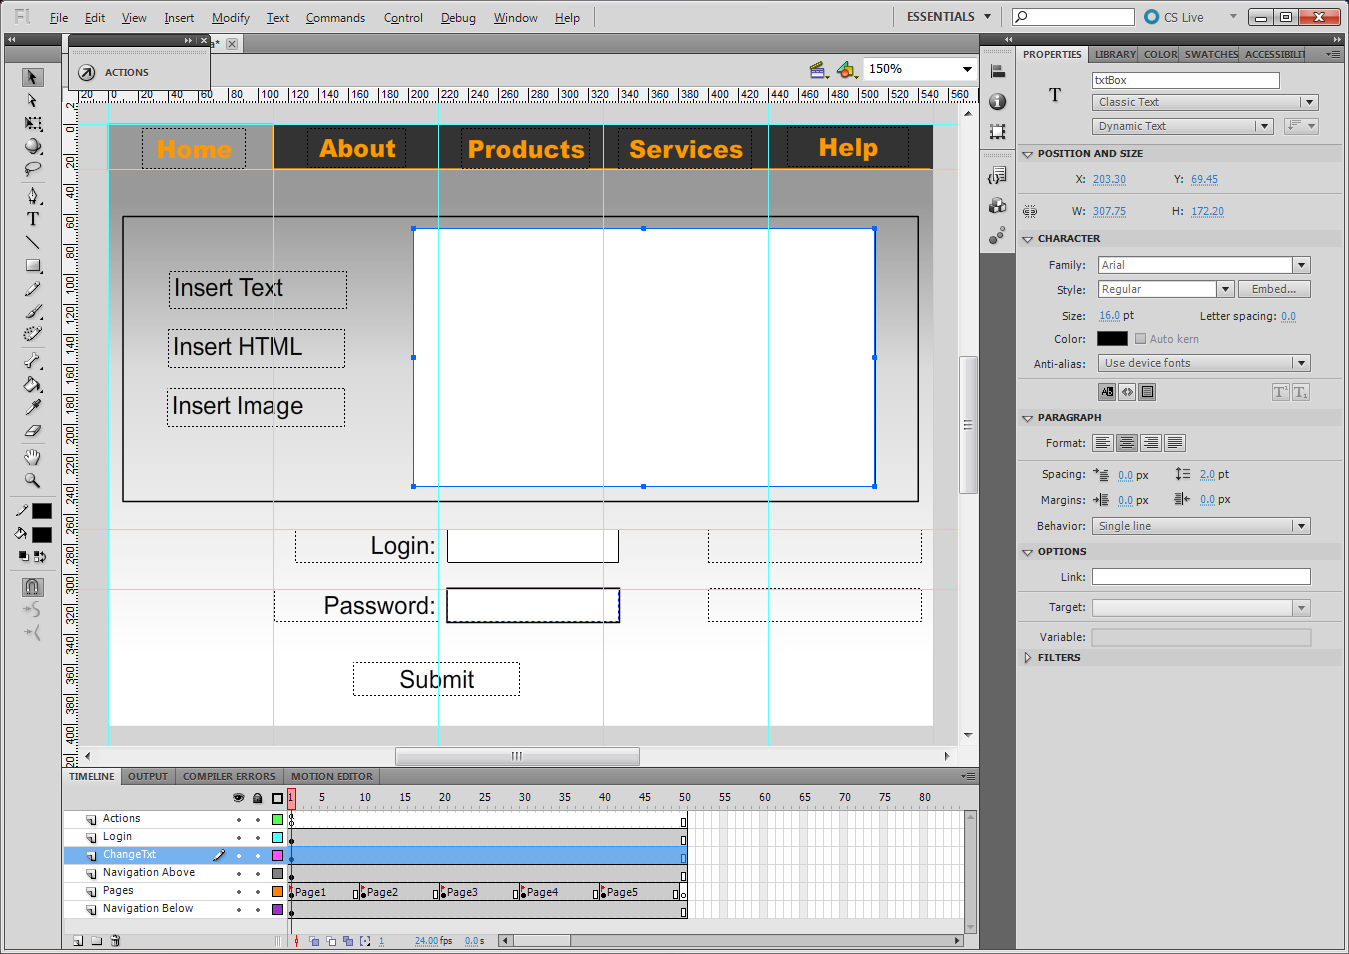
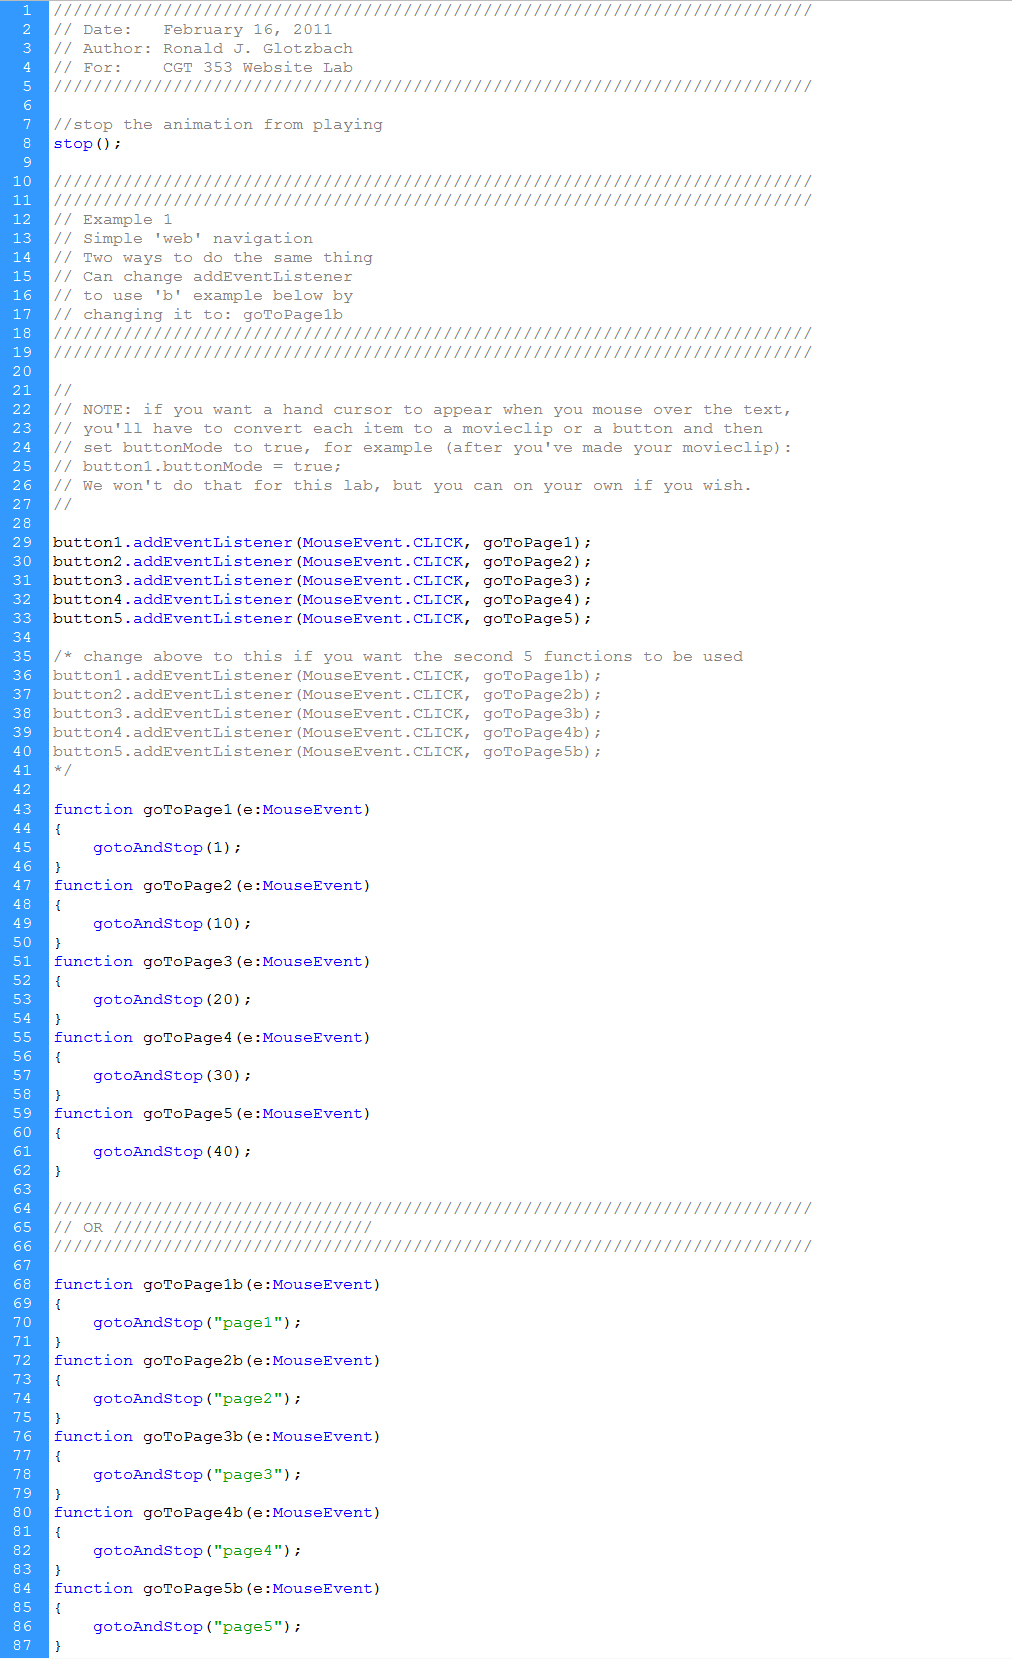
Click on the first frame of each section and give them each a label: page1, page2, page3, page4, page5 (no spaces)
Navigation below:
Layout the background for the stage as well as the background color for the navigation buttons on the top. Use a mild gradient for the background of the stage
Navigation above:
Add the text for the navigation buttons and set the color
Give the buttons instance names: button1, button2, button3, button4, button5
Pages layer (second part):
On the first frame of each page, change the background color of the tab to be highlighted.
On the first frame of each page, add the design line (orange line) that visually ties the tab to that page.
On the first frame of each page, add the subnavigation menus (click through the pages of the example below to see the subnavigation menus appear)
ActionScript:
On frame 1 of the ActionScript layer, add this code to make your pages start functioning.
ChangeTxt layer:
On frame 1 of the ChangeTxt layer, create a bounding box or other visual design element to separate this area from the other sections.
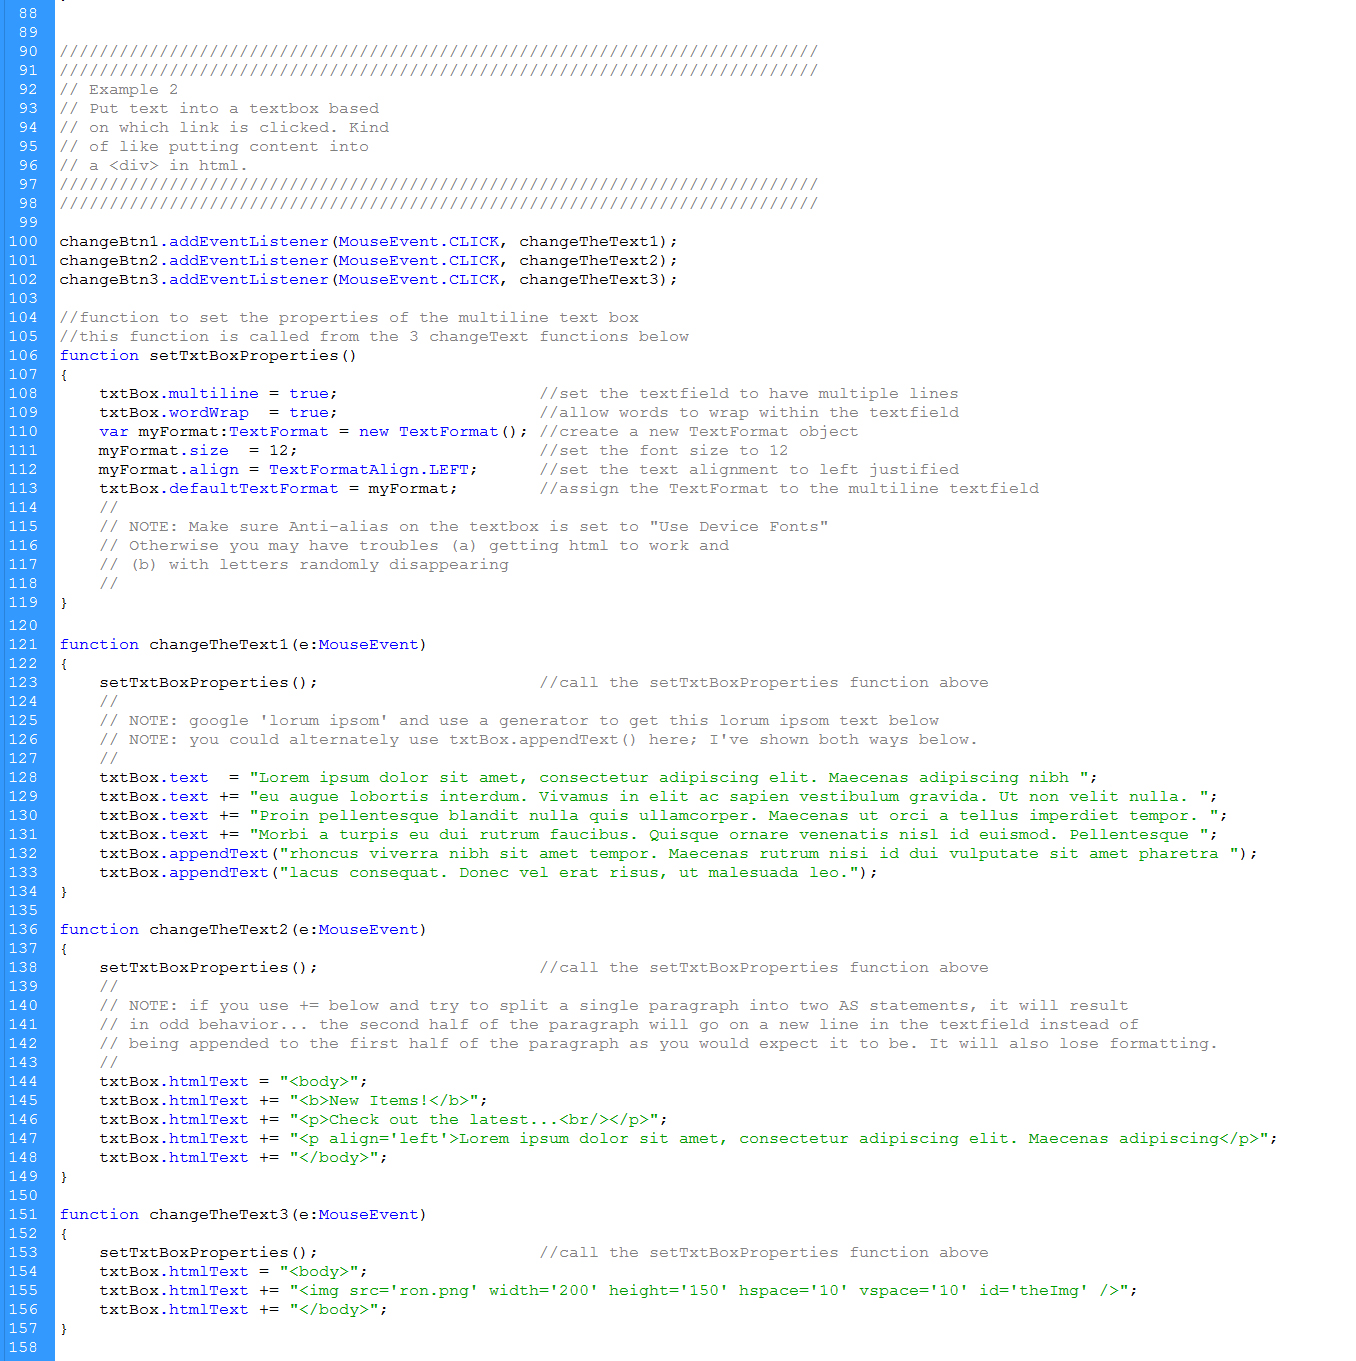
Place 3 textfields as shown: Insert Text, Insert HTML, Insert Image
Give the textfields instance names: changeBtn1, changeBtn2, changeBtn3
Add a textfield of decent size, similar to the example and give it an instance name of txtBox
Click the box/button in the properties panel for "show border around text"
NOTE: make sure that Anti-alias on the txtBox is set to "Use Device Fonts" otherwise you could have trouble with getting your HTML to display properly and also with random letters disappearing from your text.
ActionScript:
On frame 1 of the ActionScript layer, add this code to make your changeTxt buttons start functioning.
Login layer:
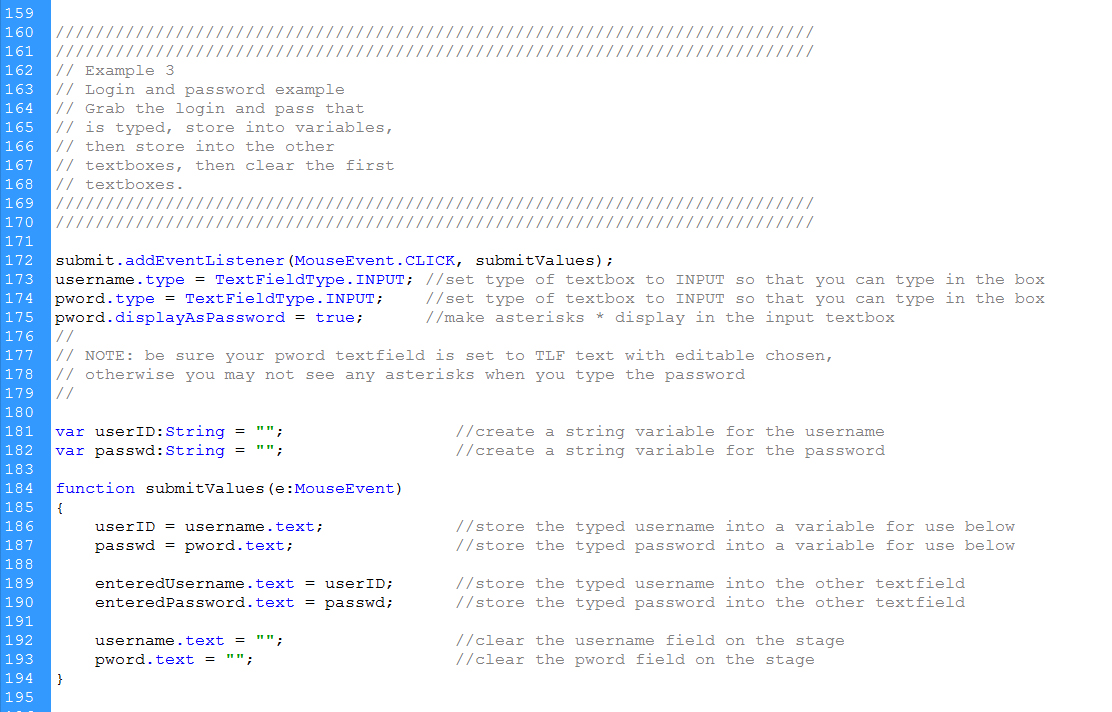
Add two textfields to be used as labels, one that says Login and the other says Password.
Add two textfields to be used for input
Click the box/button in the properties panel for "show border around text" on both textfields.
The login/username input box can be classic text, dynamic text
The password input box needs to be TLF text (otherwise your asterisks won't appear), editable
Give them instance names: username, pword
Add a textfield below that has the text 'submit' and give it an instance name of: submit
Add two textfields to the right that are invisible, give them instance names of: enteredUsername and enteredPassword
ActionScript:
On frame 1 of the ActionScript layer, add this code to make your login input fields and submit button start functioning.