|
|
Lab 8 |
File Uploading (single file, multi-file, HTML5 drag n drop)
Instructions
This lab will give you experience with uploading files to a server.
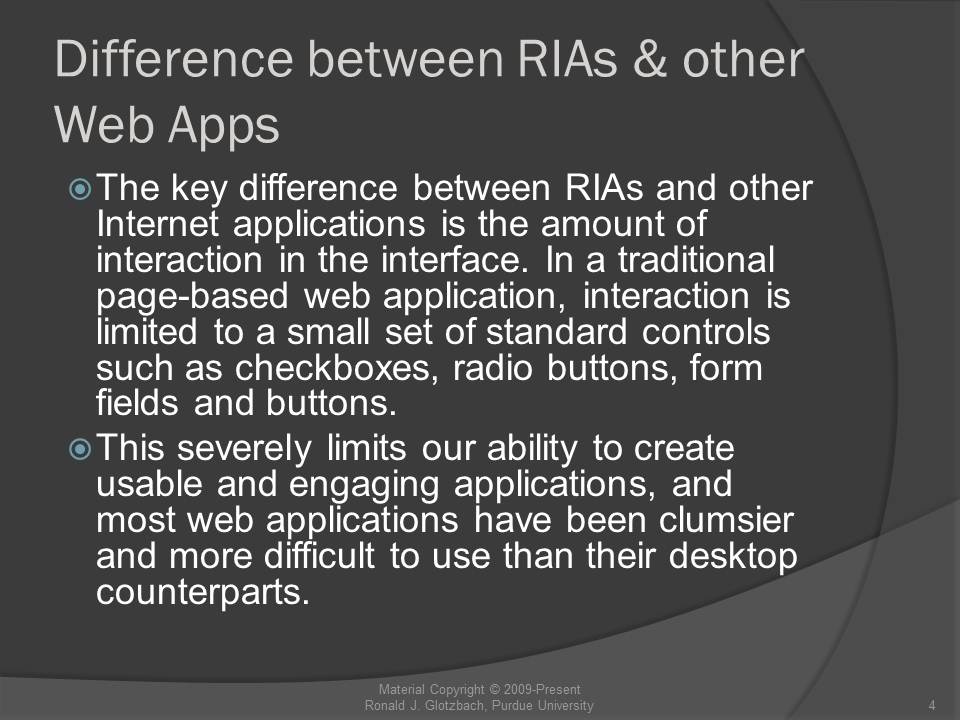
In many web development projects, there needs to be a method for users to upload
files to the server. The reasons can vary from (a) a site that wants users to be able to upload web files to their storage space, (b) our project
2 example where users need to upload images to a central location, to (c) using
the upload utility as part of a project where a model of a part needs to be
uploaded, stored on a server, tracked in a database, and then tested and manipulated
on the server.
Materials to turn in on the server:
- In your Lab08 folder:
- "mid" folder
- "thumb" folder
- index.php
- menu.php
- upload.php
- doUpload.php
- upload2.php
- doUpload2.php
- uploadResize.php
- doUploadResize.php
- default.css
- DBuploadResize.php (optional - see youtube video)
- doDBUploadResize.php (optional - see youtube video)
Standard Page Setup Requirements: Show The Code!
- The first line of every XHTML5 document should always be the following XML declaration:
<?xml version="1.0" encoding="UTF-8" ?>
- No white space (i.e.: No spaces, No line breaks) before this tag.
- You include this XML element for validation -- The encoding is for accessibility
- HOWEVER - The PHP declaration also starts with <?, so to be able to do this in PHP, you must have the following as the first thing written out to the browser - only on PHPs that contain XHTML (not on pass-through pages)
- echo("<?xml version=\"1.0\" encoding=\"UTF-8\"?>");
- The second line of each document should use the XHTML5 DTD for the
<!doctype> tag.
<!DOCTYPE html>
- The next line of code should be the opening <html> tag. The <html> tag in every document should always be:
<html xmlns="http://www.w3.org/1999/xhtml" xml:lang="en" lang="en">
- xmlns specifies the XML namespace for a document.
- xml:lang specifies the contents and attributes as English and is a required accessibility standard.
- lang specifies the content of a tag as English and is a required accessibility standard.
- At the top of every XHTML5 file, between the <head> and </head> tags, place a <meta> tag as shown below:
<meta charset="utf-8" />
- The encoding type (UTF-8) should match the encoding in the XML declaration above.
- All pages should conform to the
wellformedness constraints of XML (and XHTML).
- All formatting should be done using CSS
Exercise Specifications
- index page
- List the links to the other pages in this lab (starting point of navigation for grading)
- link to upload
- link to upload2
- link to uploadResize
- Working Solution
- Change permissions on 3 folders: upload, mid, thumb
- Do this for each of the 3 folders:
- Right click on folder > Properties
- Security tab
- Select Edit...
- Select IUSR
- Make sure the Allow checkbox for Modify is checked
- Select IIS_IUSRS
- Make sure the Allow checkbox for Modify is checked
- Apply, OK
- Repeat for each folder
- File Uploading (upload & doUpload)
- Use these starter files
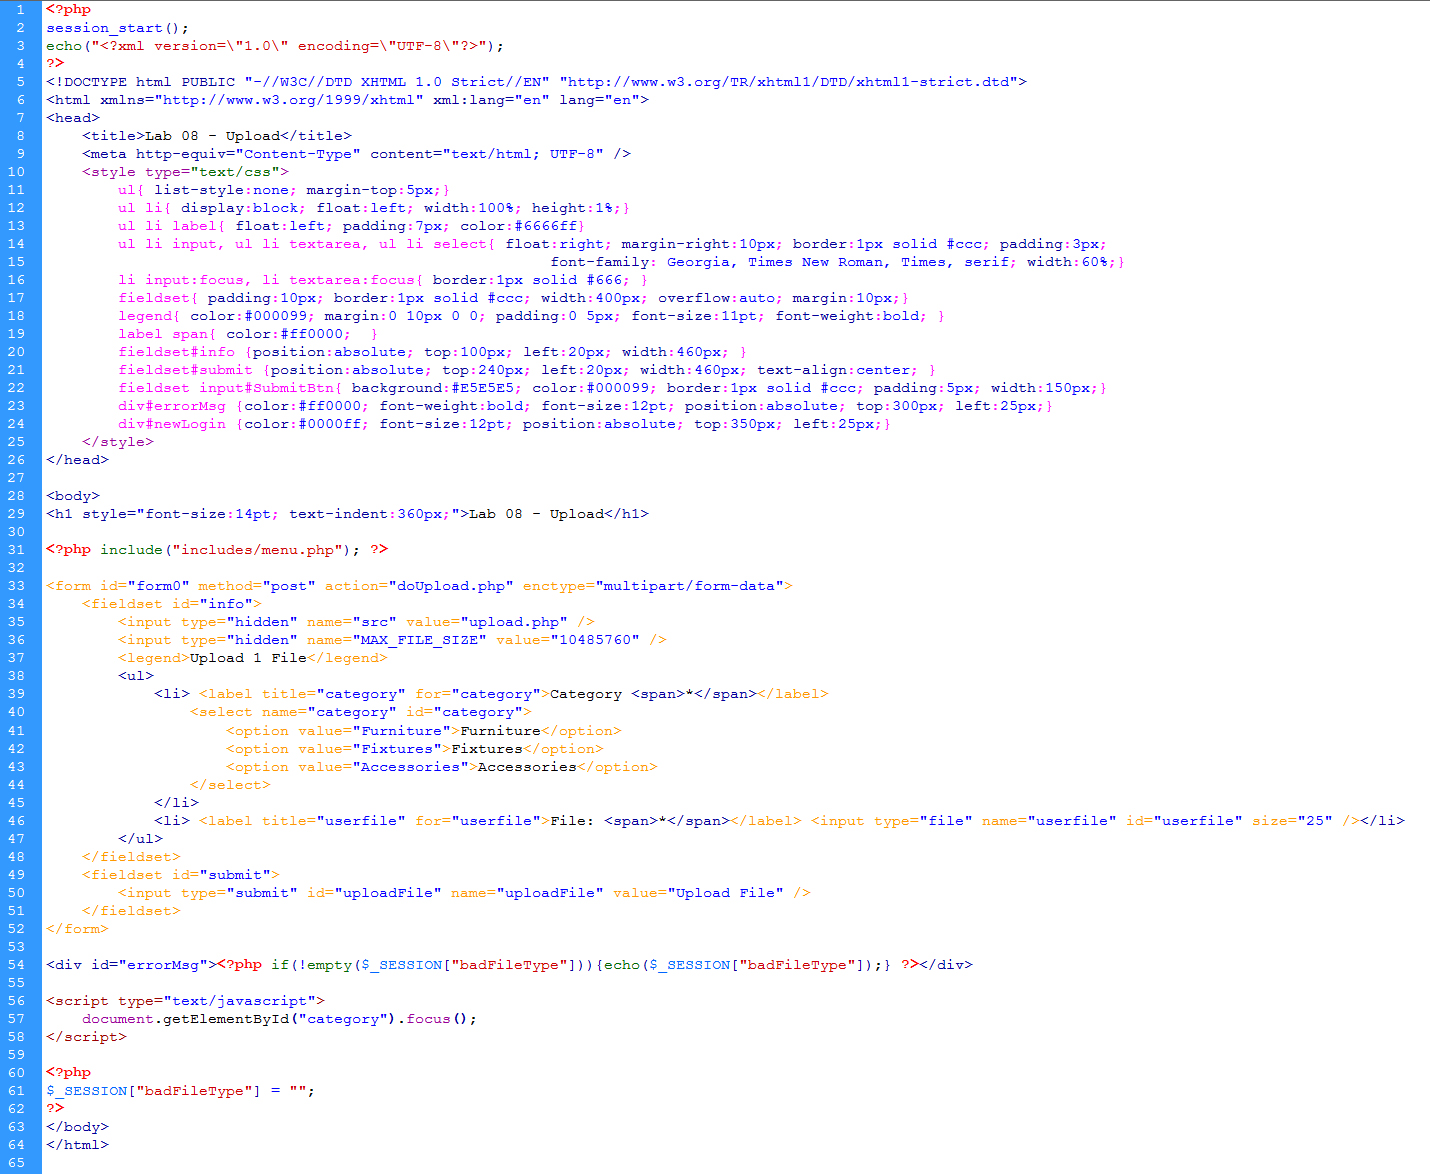
- upload page
- For the first part, create a page to upload only one file at a time.
- One drop down box with 3 options: Furniture, Fixtures, Accessories
- One file upload box with its associated browse button
- One submit button
- You must put enctype="multipart/form-data" in your form tag.
- You must set the method of the form tag equal to post
- Write out a Session message in case of bad file type
- The finished code should look similar to this example
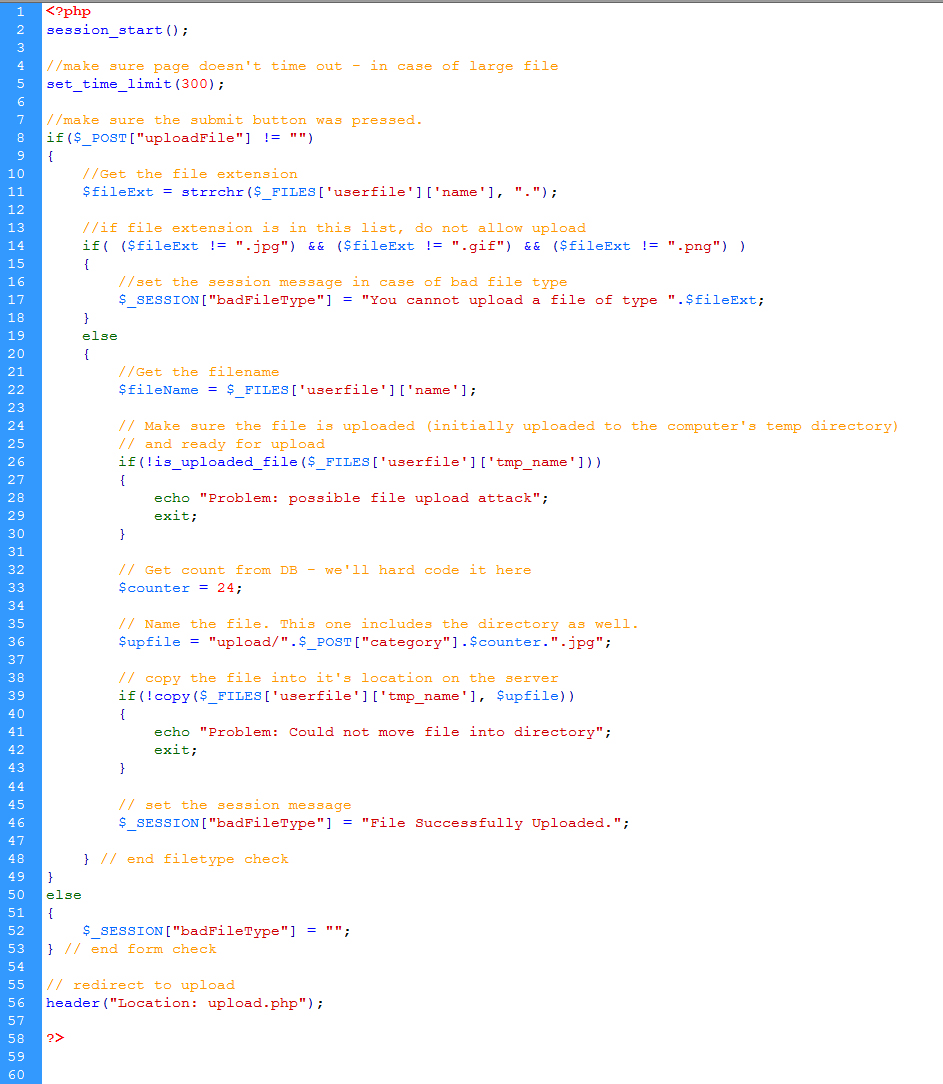
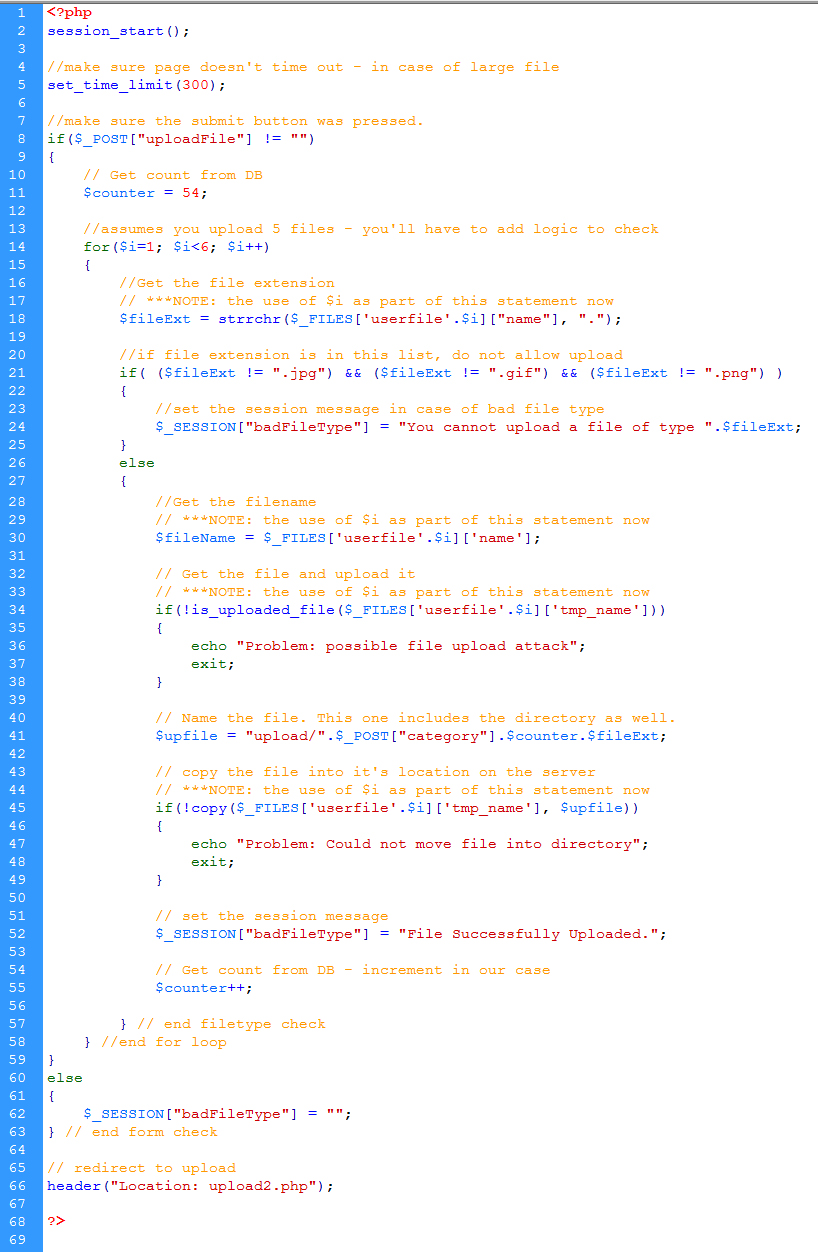
- doUpload page
- You may need to look up: strrchr(). It is a string manipulation.
- set the time limit for uploading
- check to make sure the uploaded file is not empty
- if it is empty, set the session message to let the user know
- if it's not empty
- Check the file type: ".jpg" ".gif" ".png"
- if the file type is wrong
- set the session message for the user
- otherwise
- get the file name and store it
- check to see if the file is ready for upload / copying
- hard code a counter
- name the file - include the directory structure
- copy the file into place - write out an error if there is one
- set the session message to a successful message
- Finally, redirect back to upload
- The finished code should look similar to this example
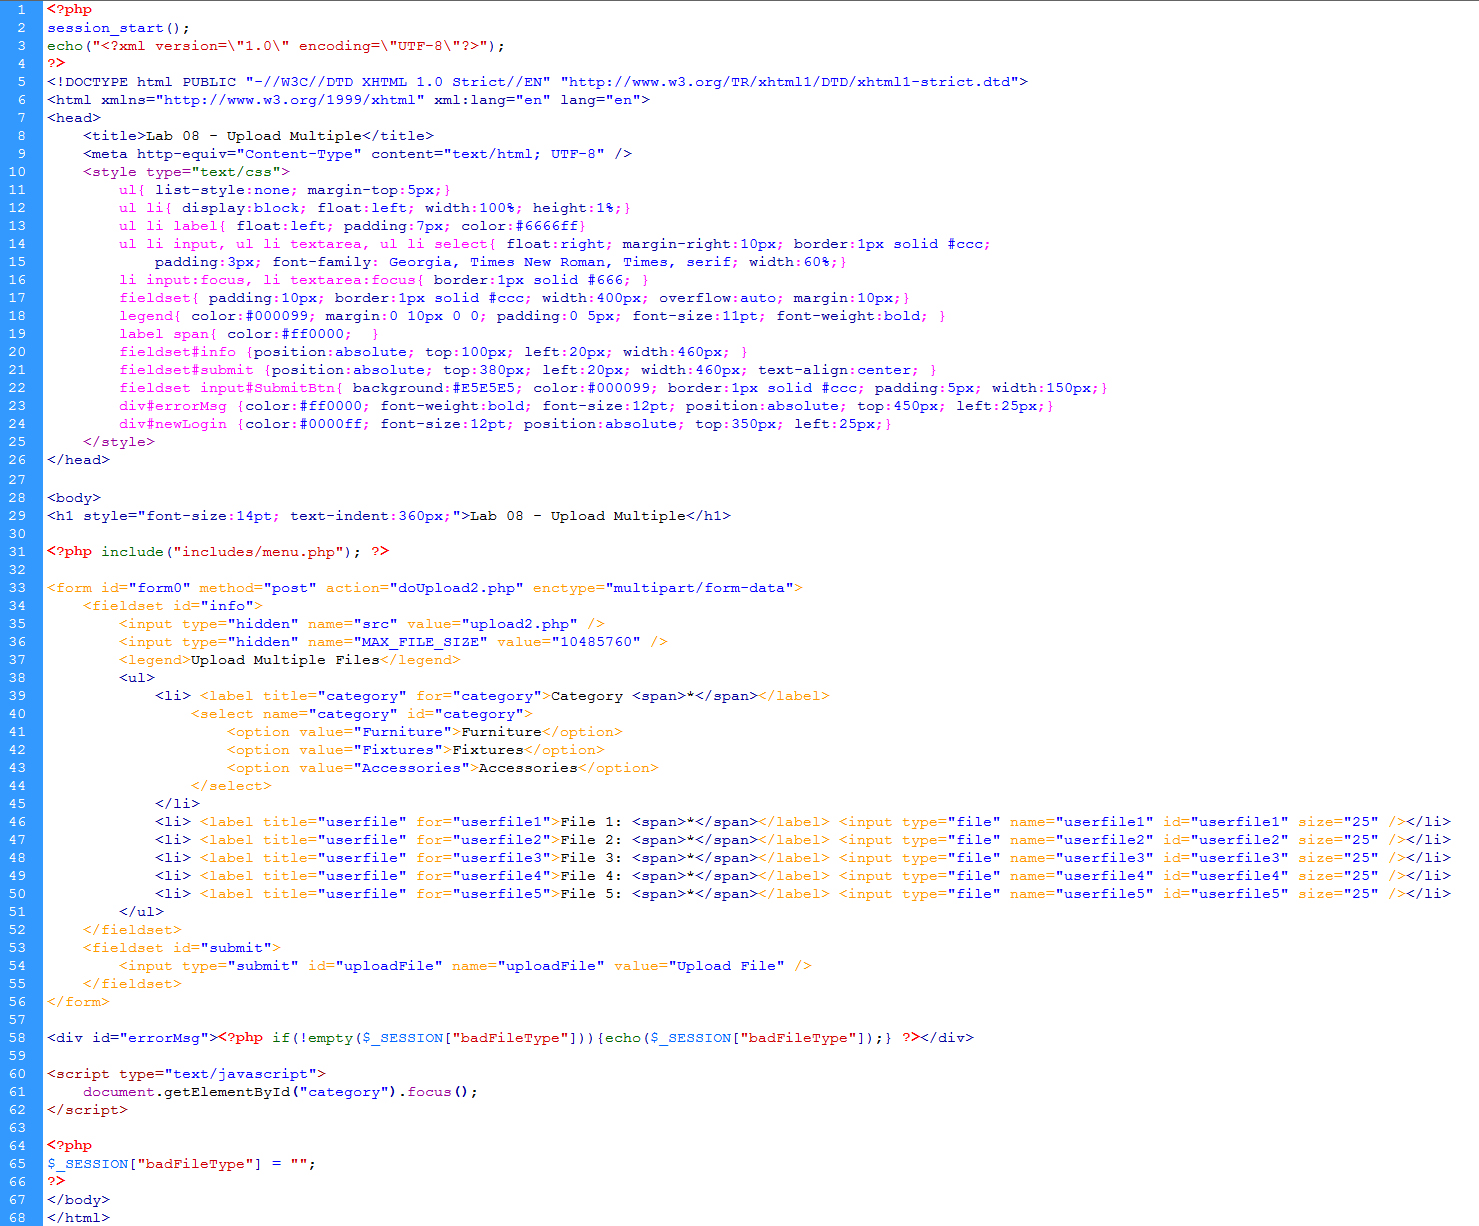
- Uploading multiple files at once (upload2 & doUpload2)
- Copy and rename the files from #4.
- Add four more file inputs to upload2 (upload 5 files at once)
- Add the code in doUpload2 to store the files to the server
- Hint: you will need to use a for loop.
- upload2 code
- doUpload2 code
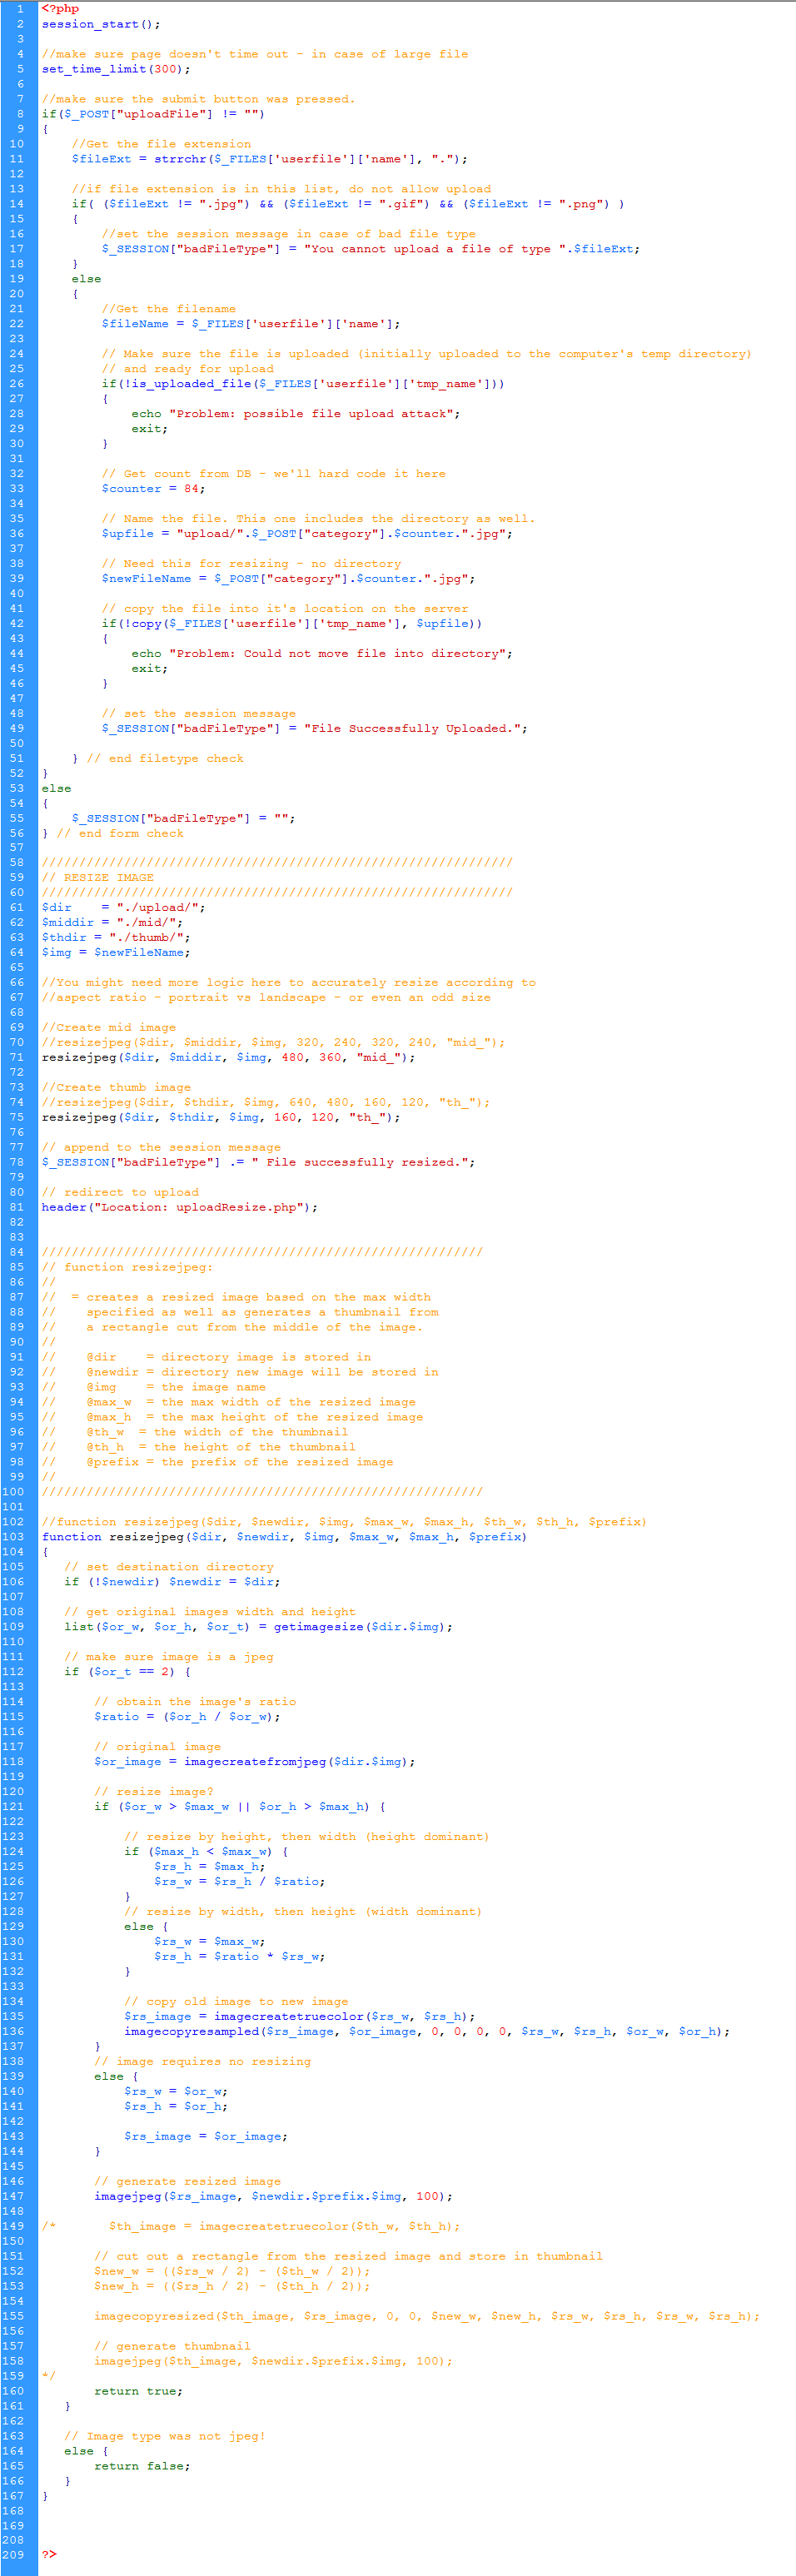
- Image Resizing
(uploadResize & doUploadResize)
- When a user uploads a new image, you will
need to resize that image so that it will fit within the parameters of
your website - create thumbs.
- Copy and rename the files from #4 again (we're only uploading 1 file at a time).
- For PHP image resize: Use this resize function
- You will use the thumbs and mid subdirectories you created above to save your files to.
- Note: As a reminder once again, the folders that you are saving files to need to have Modify and Write
Permissions set for the Internet Guest Account. Anytime you upload, write, modify, save, etc files on the server, you must set permissions on the folder containing those files.
- Change the logic to only allow JPG images to be uploaded.
- Then after the logic from #4, add the following resizing logic.
- Create variables for: folder name for thumbs, mid, and full images
- Create a variable for the image name (this variable should not contain the directory structure)
- Resize to mid width of 360 and save to mid folder
- Resize to thumb width of 120 and save to thumb folder
- Redirect to uploadResize with a success message
- doUploadResize code
- Make sure it works on the server!!!
- Save a backup copy to your personal drive space.
- Do not modify any files after the deadline. Timestamps on all files will be checked during grading.
Validation & Accessibility
- Validate your pages using (a) Dreamweaver and (b) the HTML Validator add-on for Firefox. Fix any
errors before turning in.
- Pre-rendered HTML: Use Dreamweaver built-in page validation
- Post-rendered HTML: Firefox: View source _or_ Icon on bottom / status bar > Double click for details
- Using only Dreamweaver is not good enough
- Always fix the error on top first. Only fix one or two errors at a time. Many times, fixing the top error fixes errors below it.
- Check for JavaScript and CSS errors using the Web Developer toolbar in Firefox.
- Make sure there is a green check for (a) Standards Compliance Mode, (b) CSS, and (c) JavaScript
- Check accessibility issues using the Accessibility Extension add-on for Firefox. Fix failures before turning in.
- Accessibility > Reports > Accessibility Issues
- Validate against FAE rule set
- This will not fix all accessibility issues, but it is a very good start.
Grading Rubric
| Drag and Drop to Upload Files |
-5 pts max |
| Browse to Upload Files |
-5 pts max |
| Resize Images |
-5 pts max |
| CSS Aesthetics |
-5 pts max |
| Page Validation and Accessibility |
-5 pts max |
| |
|
| Total |
25 pts possible |
|
|
| |


